Roblox Blender Sword: UV Mapping and Textures
UV unwrap a sword, paint its blade silver, guard gold, and grip brown, then import the textured Handle into Roblox Studio.
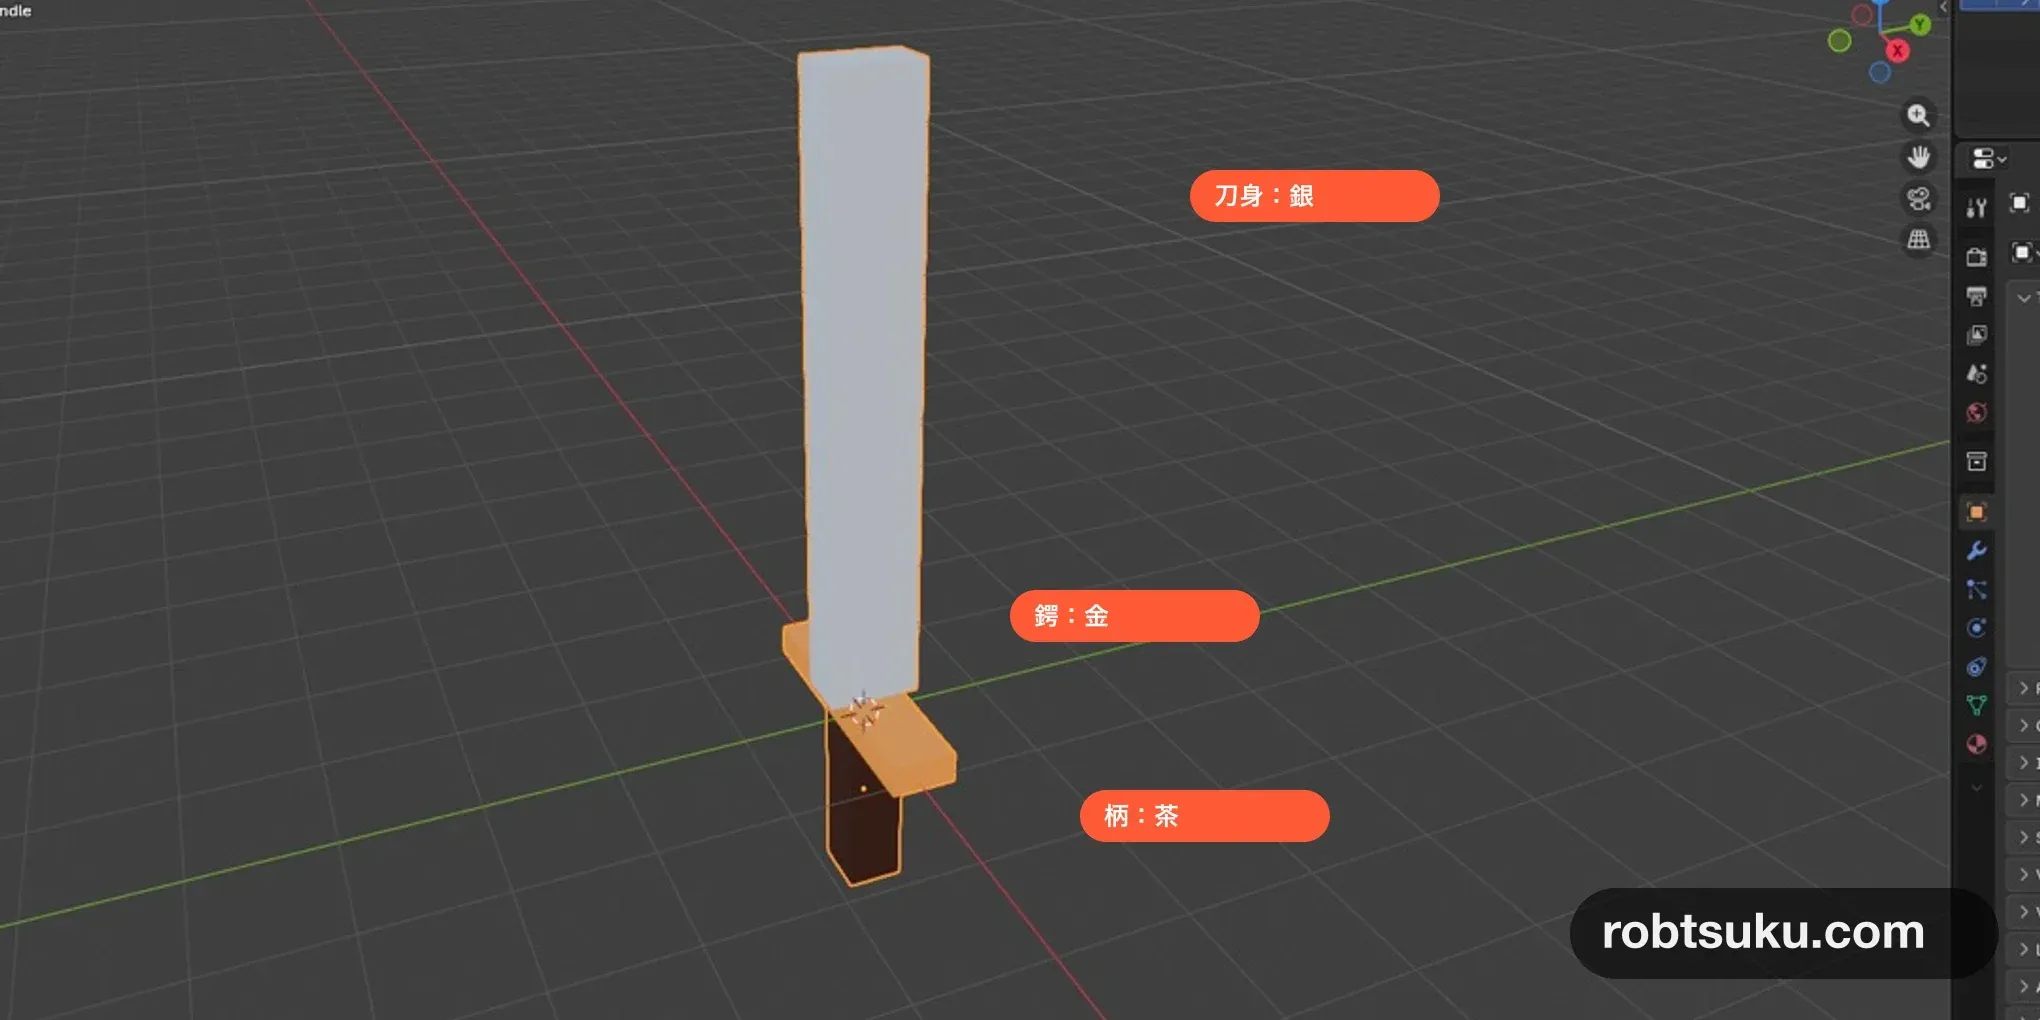
Paint the sword’s blade silver, the guard gold, and the grip brown. One PNG will carry all three colors into Studio, where they remain visible both in edit mode and while the avatar holds the Tool. Allow about eight minutes.
Start with original-sword.blend, original-sword.fbx, and StarterPack > OriginalSword from Make a Roblox Sword in Blender. Updating a model with Reimport is optional, not a prerequisite.
1. Unwrap the sword onto a 2D UV layout
Open original-sword.blend and select Handle. Switch to the UV Editing workspace, press Tab for Edit Mode, and press A to select every face. In the left editor, choose UV > Smart UV Project, set Island Margin to 0.02, and run it.
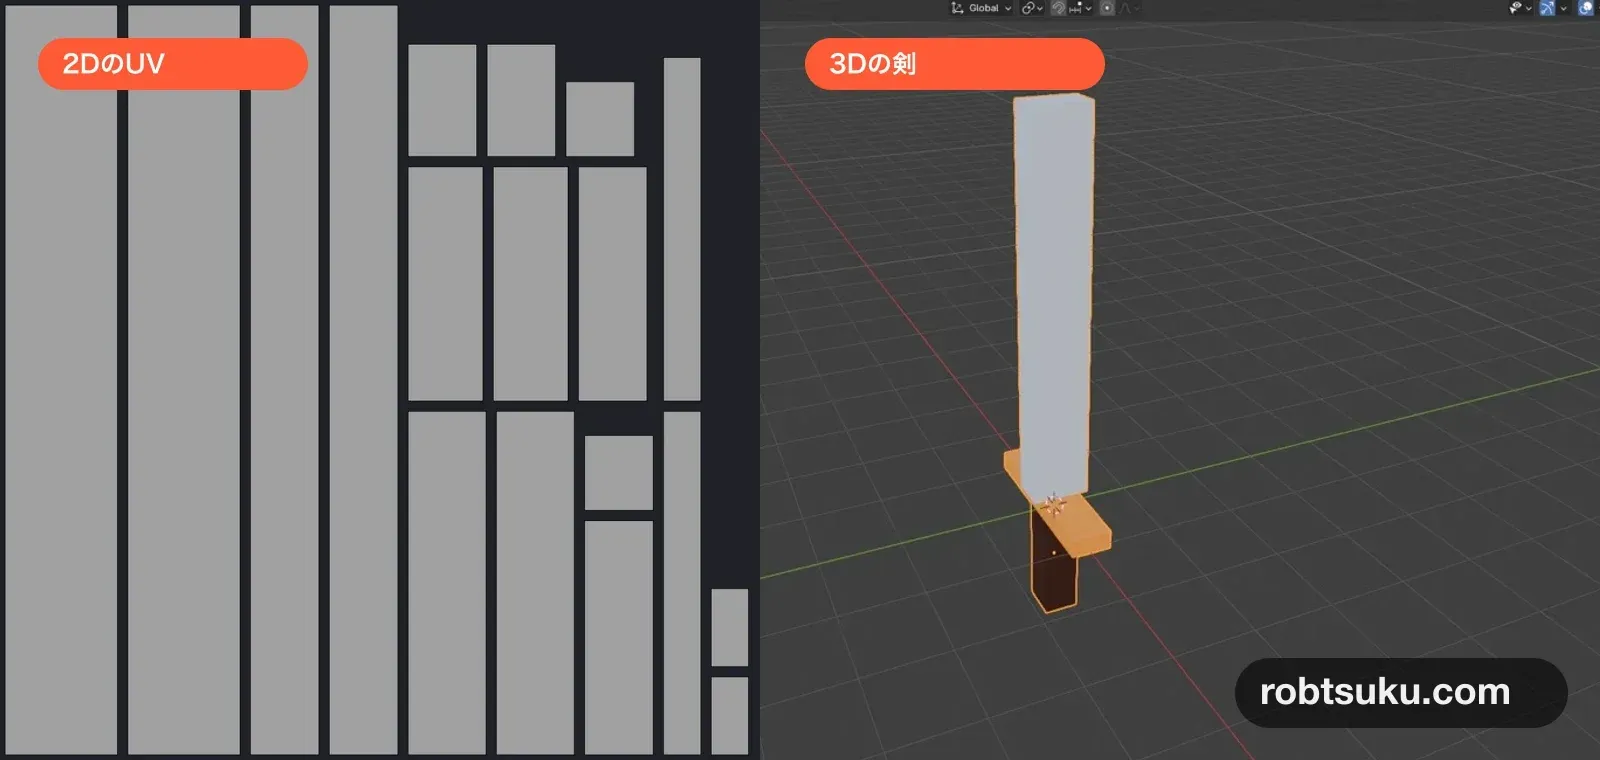
Roblox’s texture-painting UV guide also uses Edit Mode, all faces selected, Smart UV Project, and an Island Margin of .02.
Tip — UV maps a 3D surface to a 2D image
A UV layout tells Blender which part of a flat image belongs on each mesh face. If the blade’s faces point to a silver area of the image, the 3D blade appears silver. Smart UV Project creates that layout automatically.
The left editor should show several long rectangles and smaller shapes. These separate groups are called UV islands; you do not need to rearrange them in this guide. If the left side stays blank, move the pointer over the 3D view, press A again, and rerun Smart UV Project.
If you lose the whole sword selection, press Tab for Object Mode, select Handle in the Outliner, return to Edit Mode, and press A.
2. Create a 1024×1024 texture image
Switch to the Shading workspace. In Material Properties, select New and name the material SwordColors.
In the node editor, add an Image Texture node. Choose New on that node and create:
| Setting | Value |
|---|---|
| Name | original-sword-color |
| Width | 1024 |
| Height | 1024 |
Drag the yellow Color output of Image Texture to Base Color on Principled BSDF.
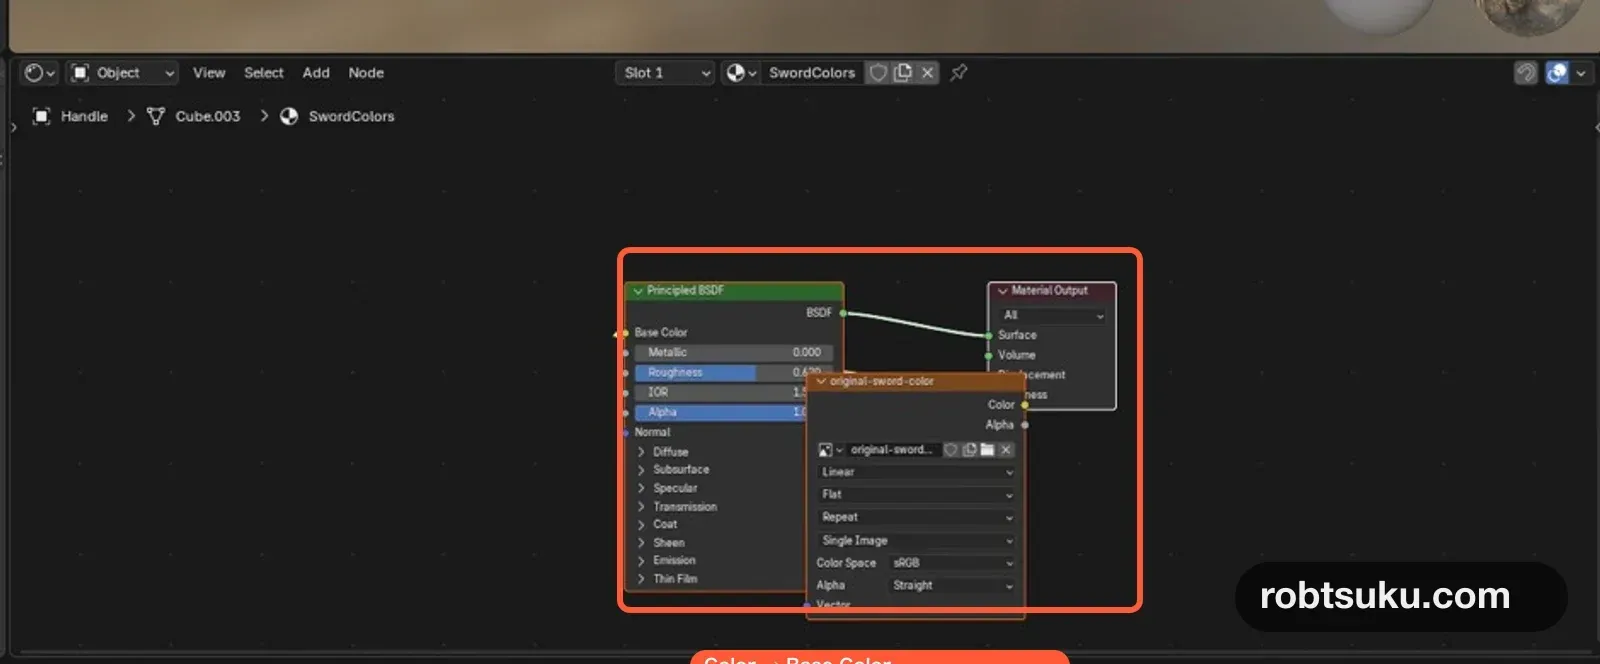
Roblox’s official Blender texture settings connect the basic color image from Image Texture’s Color output to Principled BSDF’s Base Color input.
Tip — A texture stores the surface appearance
The mesh stores the sword’s shape. A texture is an image applied to that surface. Here,
original-sword-color.pngstores the blade, guard, and grip colors in one image.
The sword may still look like one color because the new image has only its initial background. Before painting, confirm that the Image Texture displays original-sword-color and that the material is named SwordColors.
If the nodes disappear off-screen, move the pointer over the node editor and press Home. If the yellow line connects anywhere except Base Color, delete that connection and link the two yellow sockets again.
3. Paint the blade, guard, and grip
Switch to the Texture Paint workspace and enable Face Selection Masking in the 3D view header. Use this sequence for each connected sword section:
- Enter Edit Mode and press
Alt+Ato clear the face selection. - Place the pointer over the blade and press
Lto select its connected faces. - Return to Texture Paint, choose a silver color, and use Fill.
- Repeat for the guard in gold and the grip in brown.
The colors do not need to match exact swatches. Keep them far enough apart that all three remain distinct when the Tool is small on screen.
Rotate the 3D view after each fill and check the back. If only the front is colored, return to Edit Mode and press L over that section again so all of its connected faces are selected.
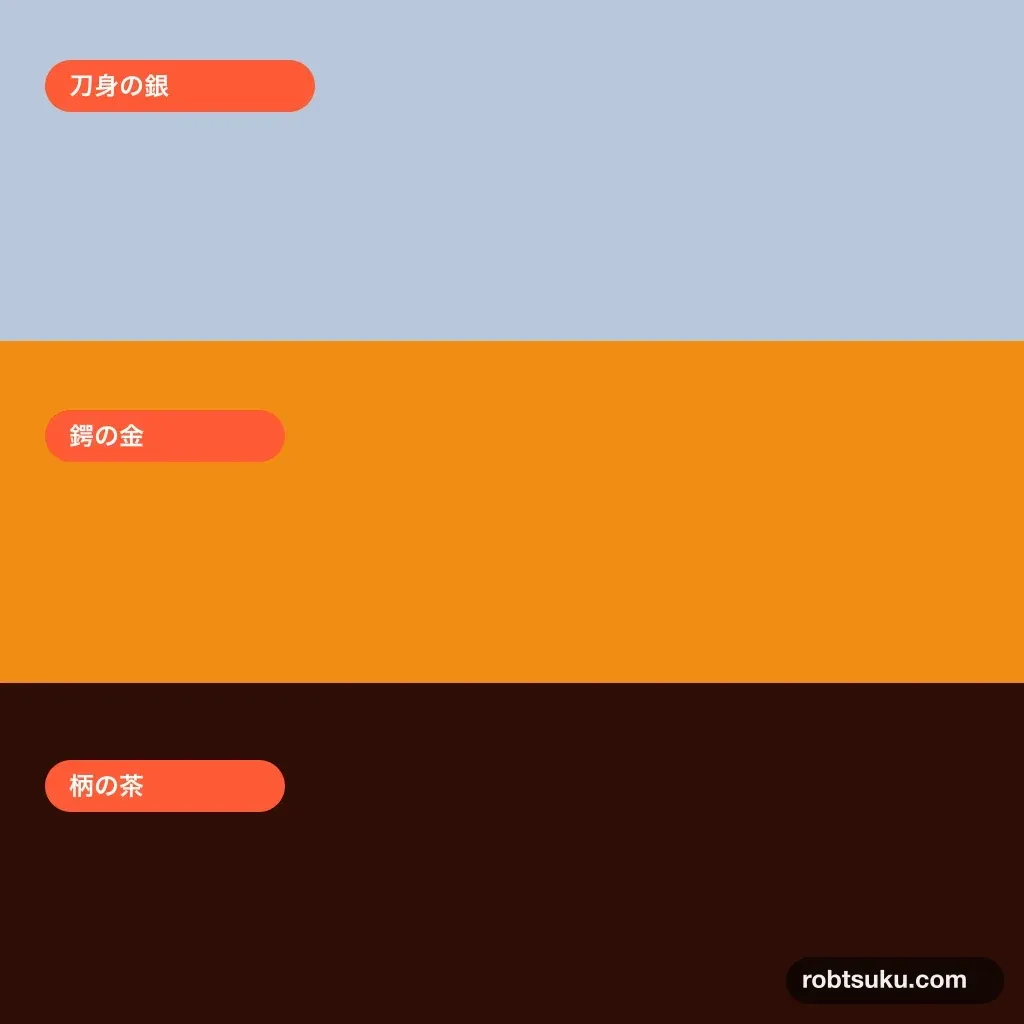
Figure guide: The upper silver area is for the blade, the middle gold area is for the guard, and the lower brown area is for the grip.
In the editor that displays the image, choose Image > Save As. Save it beside the .blend file as original-sword-color.png. Saving the .blend file alone does not write the painted image to a PNG. Roblox’s 2D texture painting steps also finish with Image > Save.
Use File > Save for the .blend file as well. The PNG stores the colors; the .blend file stores the UV layout and node connection. Close Blender, reopen the file, and confirm that the three colors return before exporting.
4. Export the FBX with its PNG
Return to Object Mode and select Handle. Choose File > Export > FBX (.fbx) and export original-sword-colored.fbx with:
Path Mode = CopyEmbed TexturesonSelected ObjectsonApply Scalings = FBX Units ScaleForward = Z ForwardUp = Y UpBake Animationoff
Roblox’s Blender FBX export requirements use Path Mode Copy and embedded textures. Keep the FBX and PNG in the same folder.
Before exporting, switch the 3D view to Material Preview and check that all three colors are visible. If you changed paint after the previous save, run Image > Save again; exporting a new FBX does not update an old PNG.
In Studio, choose File > Import and select original-sword-colored.fbx. Import only when Preview shows one Handle, no warning or error, Anchored off, and the same Front, Top, and Stud settings used for the untextured sword. Replace the old StarterPack > OriginalSword > Handle with the imported colored Handle, then confirm that the new Handle has Anchored and CanCollide off.
If you already completed the Reimport guide, keep the object name Handle and select the colored FBX through Reimport > Configure instead.
If the imported mesh is white, import original-sword-color.png as an image in Studio. Copy its asset ID and paste it into Handle’s TextureID. Importing the image adds a private asset to your inventory; it does not enable Open Use or publish the image to Creator Store or Marketplace.
Wait for Import Queue to report success before copying the asset ID. Remove any leading or trailing spaces from the TextureID value. This guide does not require saving or publicly publishing the place.
5. Verify the colors in edit mode and Play
Select StarterPack > OriginalSword > Handle in edit mode and rotate the view until you can distinguish the silver blade, gold guard, and brown grip.
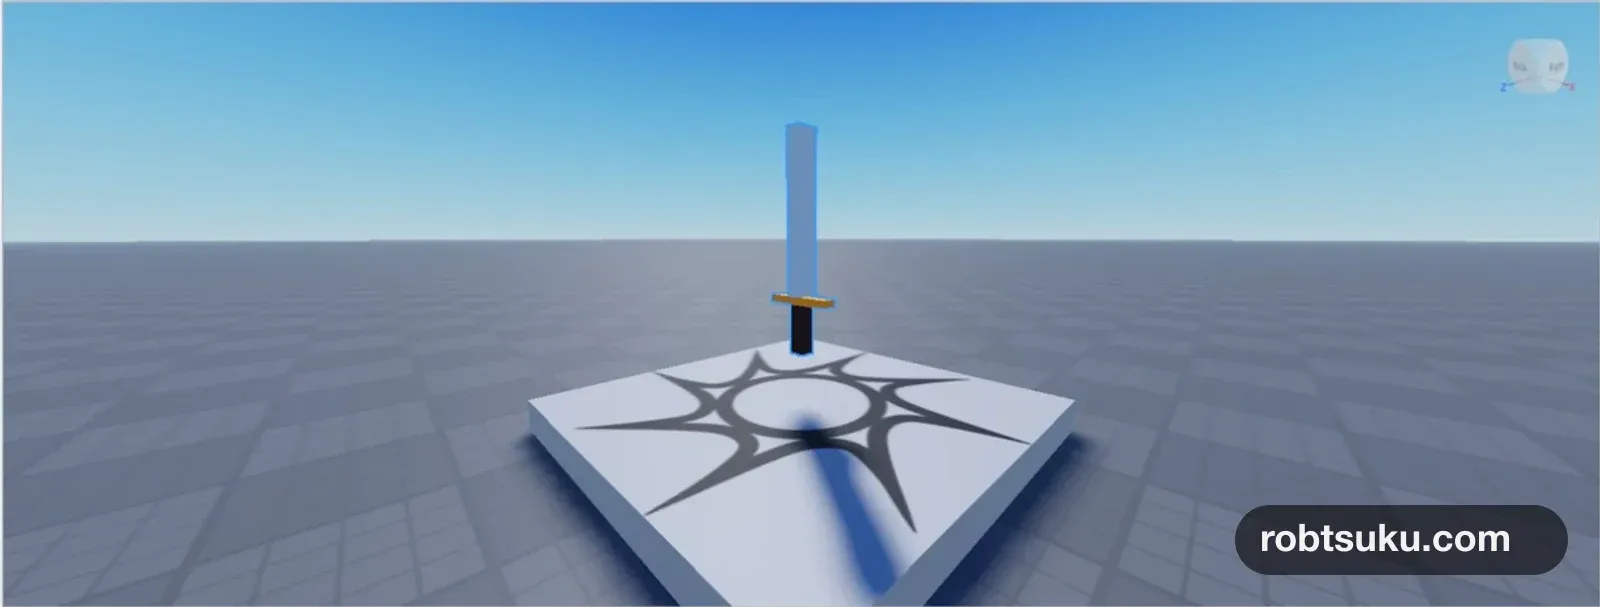
If the whole sword is white, return to the PNG save and TextureID checks before changing the Tool hierarchy.
Press Play and equip OriginalSword. The tested R15 avatar should hold the brown grip, with the gold guard above the hand and the silver blade pointing upward.
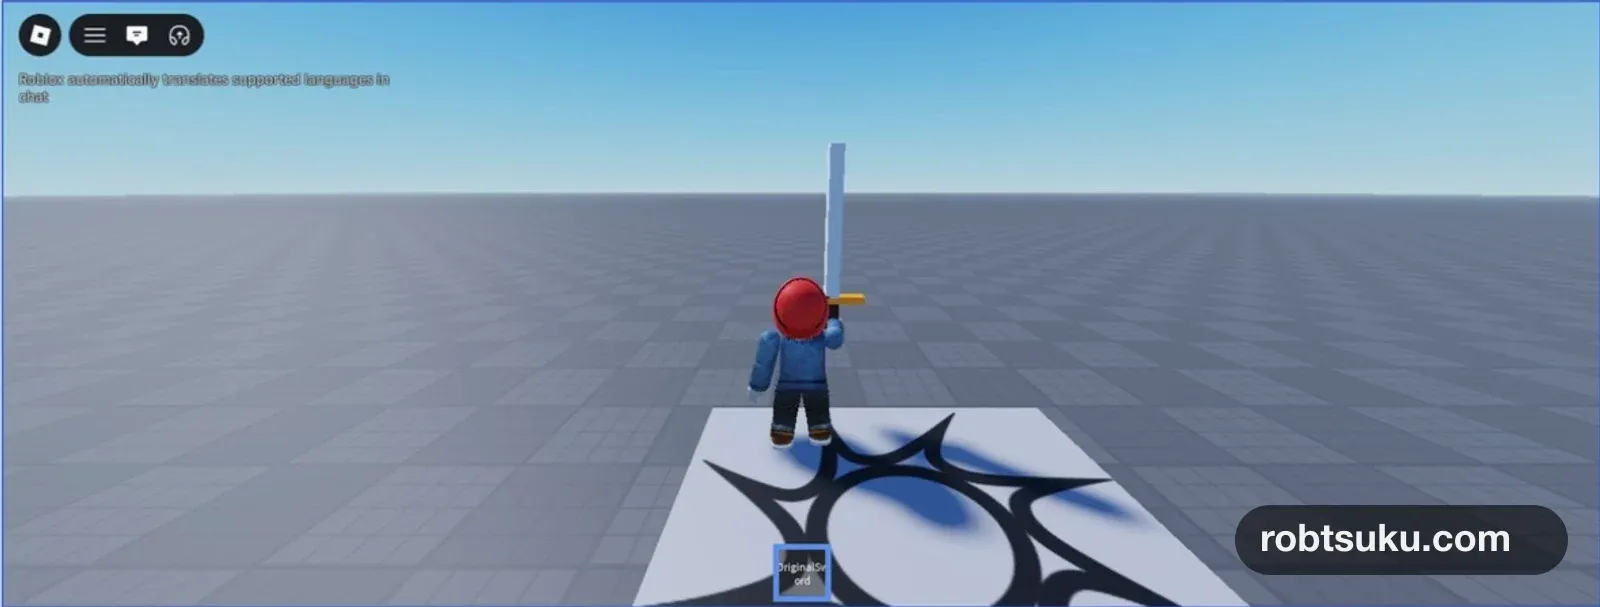
View the sword from a close side angle. Only the grip should overlap the hand; the blade and guard must not pass through it. Unequip and re-equip from the same hotbar slot and confirm that the colors and orientation return.
This avatar-fit result was verified for the blog account’s current R15 avatar. Repeat the close contact and intersection checks before claiming support for R6 or another body proportion.
Stop and start one more Play session. If OriginalSword returns with all three colors, the source Tool in StarterPack—not only the temporary Play copy—contains the textured Handle.
Troubleshooting
- The whole sword receives one color: Enable Face Selection Masking and press
Lover only the connected section you want to fill. - The sword is white after reopening Blender: Save the PNG with Image > Save As, then reopen that image in the Image Texture node.
- Only Studio shows a white sword: Keep FBX and PNG together, import the PNG, and set Handle’s
TextureID. - The colors appear but the sword will not equip: Restore one MeshPart named
Handledirectly belowOriginalSword. - Equipping prevents the avatar from moving: Turn the colored Handle’s Anchored and CanCollide properties off, then start a new Play session.
Completion check
- The Handle has a Smart UV layout and one 1024×1024 PNG.
- Image Texture Color connects to Principled BSDF Base Color.
- Reopening the
.blendfile restores the silver, gold, and brown regions. - Studio edit mode and Play both show all three colors.
- The tested R15 avatar holds the grip without the blade or guard intersecting the hand.
- Unequip, re-equip, and a new Play session preserve the appearance.
The mesh remains responsible for shape, while the saved PNG now controls its three-color surface.
Official sources
Roblox Blender Sword: Import and Equip It
Build a low-poly sword from three cubes in Blender, import it through FBX, and equip it as an OriginalSword Tool with the grip in the right place.
Build this feature
Update a Blender Model in Roblox with Reimport
Make a Blender sword longer, export over the same FBX, and update its existing Handle without rebuilding the OriginalSword Tool.
Build this feature